Ever since SharePoint 2013 hit the market there has been all sorts of speculation whether sandbox solutions were deprecated (hint: as of this post, declarative ones are not officially deprecated) and the argument was always that you could use the Client Side Object Model (CSOM) to apply your branding. Well, not many folks back in 2013 had solid examples of how this would work.
Microsoft must have noticed the need for some official examples because the Patterns & Practices (PnP) team released a ton of open source examples for using CSOM to do all sorts of fun things in SharePoint including uploading and applying branding to multiple sites. In this post I’ll walk you through the steps of giving this code a try.
Before I get into the demo, do I think you should just stop making sandbox solutions for branding outright? I’m not ready to say that yet. There are certainly some pros and cons between using declarative sandbox solutions vs this CSOM method, but I’m still formulating my thoughts on what I would say for guidance. At this point, I think it’s excellent that Microsoft has stepped up and created this code that is blessed by the product team to upload and apply branding correctly with CSOM. But, on the flip side, it’s really just demo code… there is no real polish or anything like that to the user experience.
The demo (Warning a UX guy is using Visual Studio here)
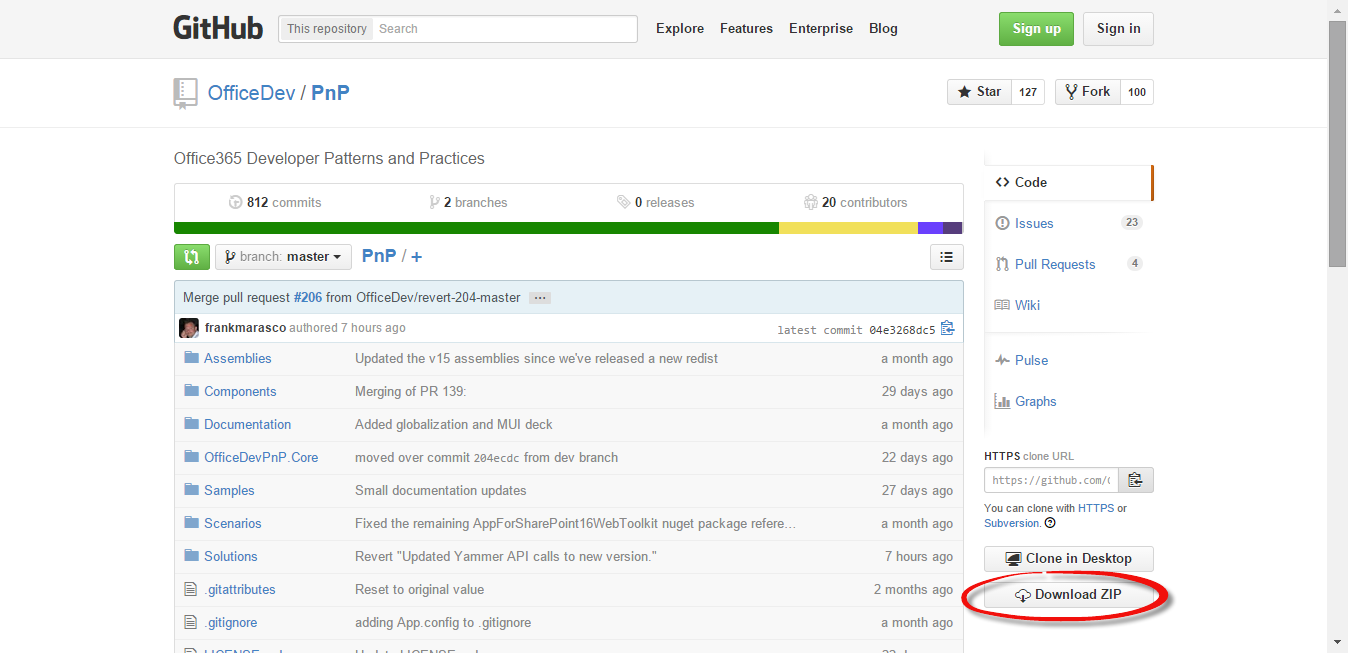
- Go grab the PnP package from GitHub: https://github.com/OfficeDev/PnP/. I’m sure there are much more developer friendly ways of doing this, but I just clicked the Download ZIP button.
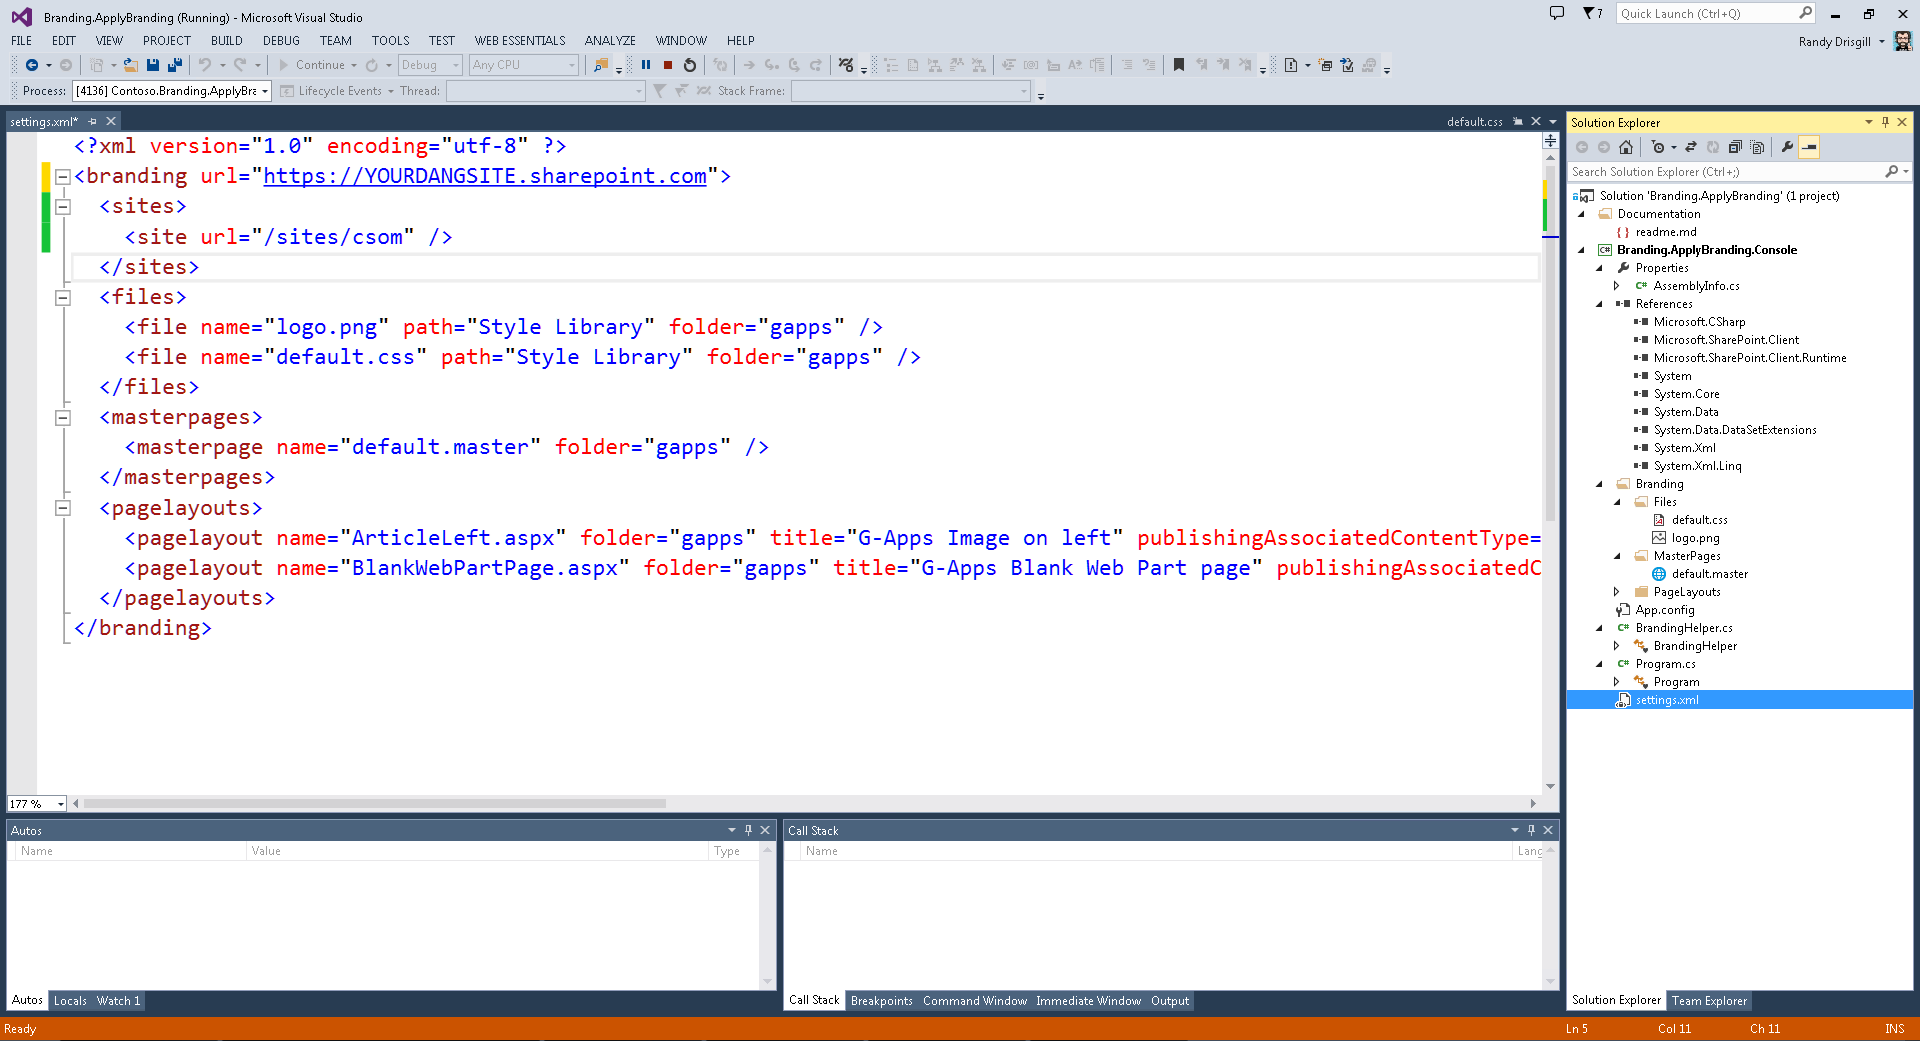
- Unzip that sucker and navigate to PnP-master\Samples\Branding.ApplyBranding and open Branding.ApplyBranding.sln in Visual Studio

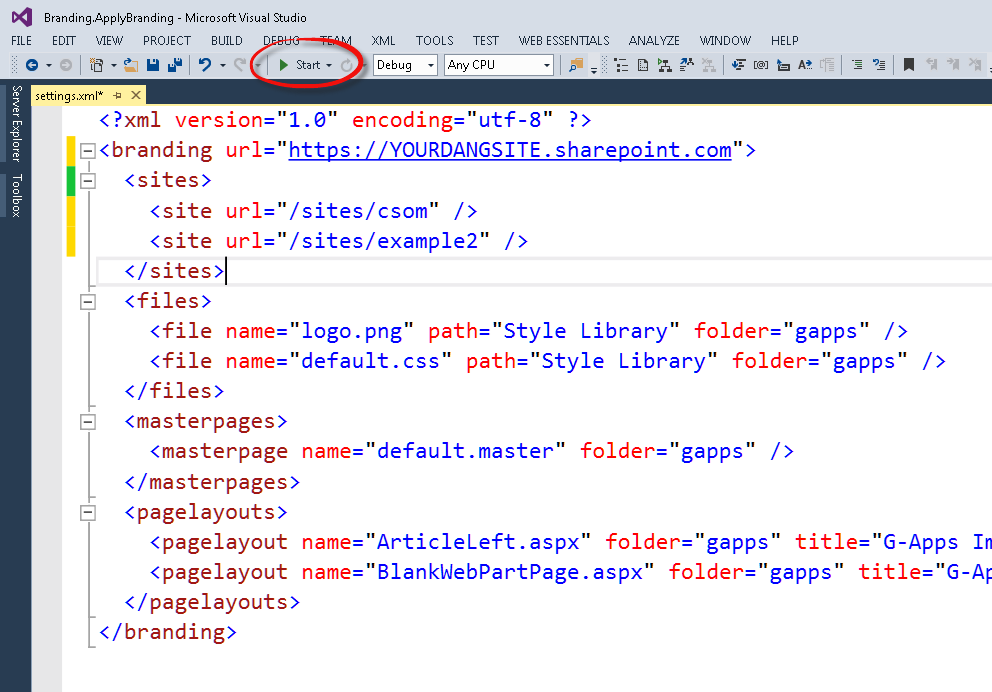
- Now you want to use the Solution Explorer on the right side of Visual Studio to open settings.xml. This file is your configuration info for where you want the branding to go and what elements you want uploaded.
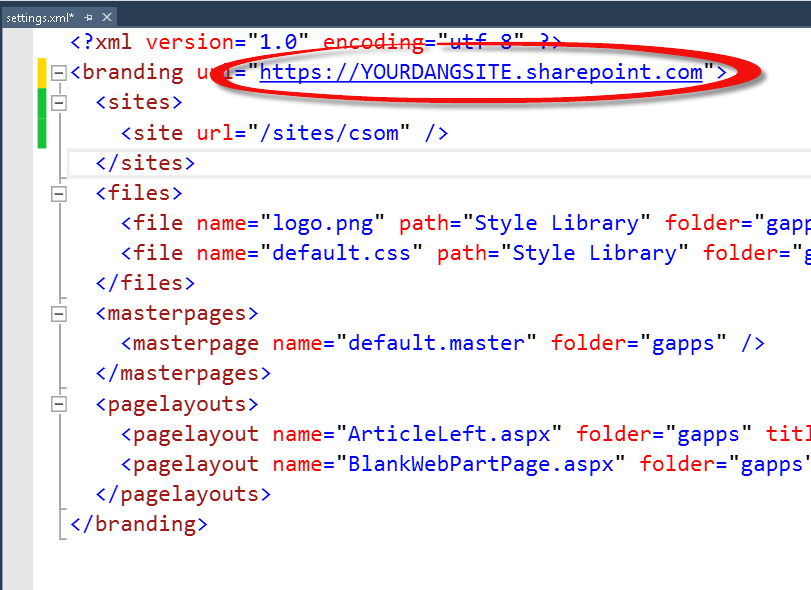
- Next, you must change the branding URL to match your own SharePoint tenant or server.
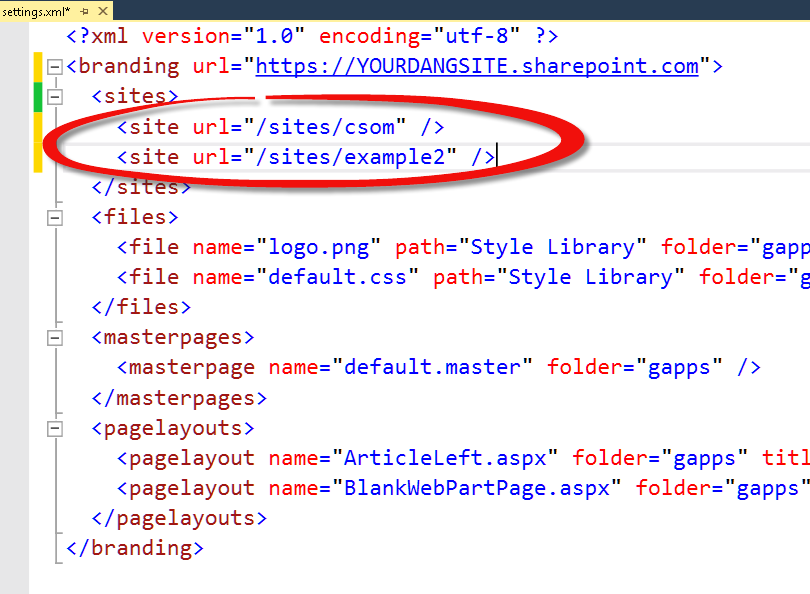
- You also need to change the entries under <sites>. You want to have one entry for each site or site collection with which to upload and apply the branding. Because this example includes two Page Layouts, you are going to want to make sure these sites have the SharePoint publishing features enabled. If you try this example on a basic team site you are going to get errors.
- That’s all you need to change before running the demo, but you can also see that there are places to add or change the images, css, master pages and page layouts that would be uploaded. Notice that the logo.png and default.css will upload to the Style Library into a folder named gapps. In the case of the master page and the page layouts, they will upload to the Master Page Gallery into a folder also named gapps.
- Now let’s try out the code by clicking the Start button in Visual Studio.
- You should see a console window open up. Enter the Username and Password for your site and when you hit enter the code will run and you can see the results returned in the console. If there are any errors (authentication or otherwise) they should be shown in the console.
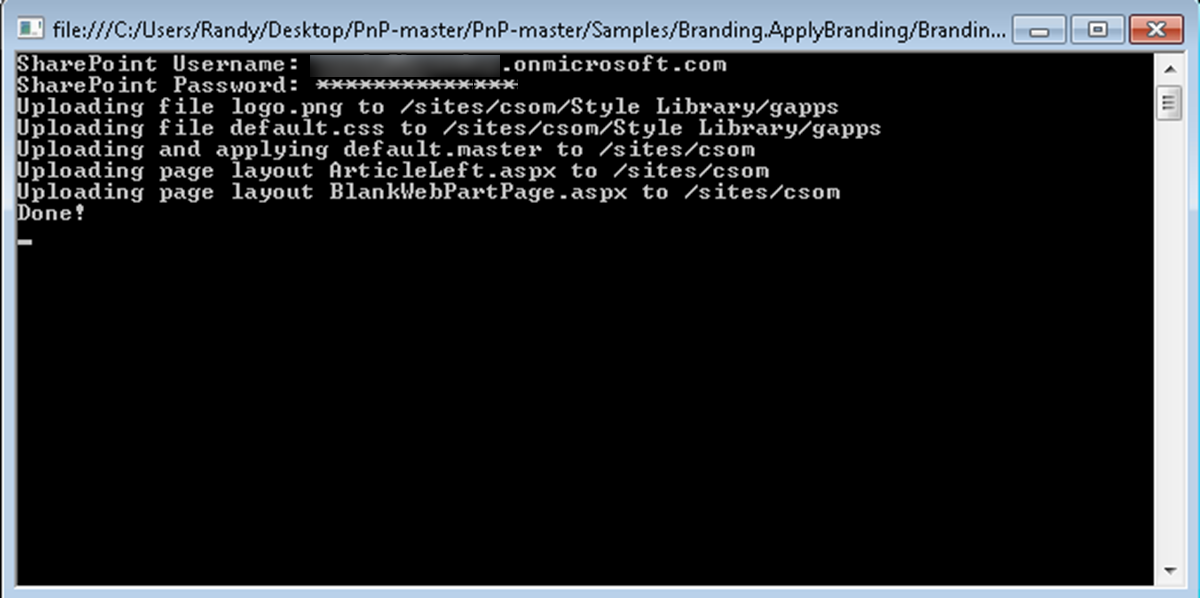
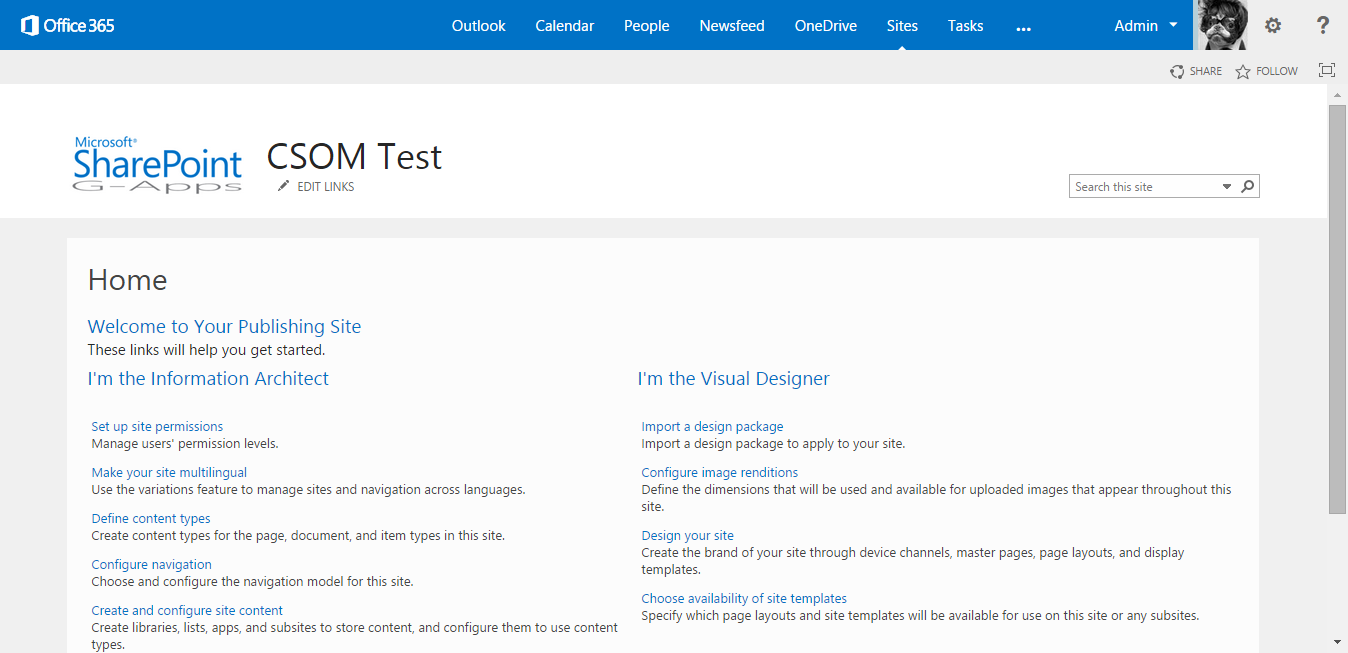
- Now that the CSOM code has run, we can take a look at the new site branding (the included branding is pretty minimal but you should see a difference).
- Also, you can check the Style Library and the Master Page Gallery and see that the files did in fact get uploaded.

That’s pretty much it for the demo. If you dig into the code, you can see that there are various methods that are called for each step that do check in/out, upload files, apply master page, add page layouts, etc. All of the code in this example is apparently blessed by the product team as being a good way to apply branding. You can also check some of the other samples and see demos of things like Alternate CSS, Themes, Display Templates, and much more.
After you try out the CSOM example, hit me up on Twitter (@drisgill) and let me know what you think of this method vs. sandbox solutions for applying branding.