Earlier this week the SharePoint Patterns and Practices (PnP) group released the Responsive UI Package for SharePoint on-premises – an open source solution for using client side code to easily make the on-premise SharePoint 2013 and 2016 UI more responsive for mobile devices. This could be an important open source project as making SP more responsive is a very hot topic these days (I was actually pretty surprised they didn’t include more responsive UI out-of-the-box with the beta’s of SharePoint 2016… but I digress). One important aspect of this solution is that no Master Pages are harmed by applying it; everything happens with client side JS and CSS… this is “the new hotness” as far as Microsoft is concerned when it comes to customizing / branding SharePoint in a cloud first world.
As someone that spends a lot of time working on responsive web design, but not a lot of time working with Powershell and the PnP solutions, I ran into a few gotcha’s when installing the PnP code. I thought some of you might find it helpful to see the steps I went through to install the Responsive UI Package as well as learn a little bit about what you get from package. I’ll start by talking about what you get; if you want to learn how to install it just scroll down to the last section.
What does the Responsive Design Package do for you
When the package is applied to your site, two things happen. First, the Mobile Browser View Feature is deactivated since it would step on the toes of a real responsive UI. Secondly, a Custom Action is applied that adds a call to PnP-Responsive-UI.js from the <head> of the page. This script then does the real heavy lifting by adding a reference to jQuery, making DOM changes, showing/hiding hamburger menus, and loading the responsive styles (pnp_responsive_ui.css).
The package mainly works with Team Sites and creates CSS media queries for common desktop, tablet, and smart phone sizes. According to the GitHub project page: “The Responsive UI is applied to the following pages of the root site of a Site Collection, as well as of any sub-site (as long as you disable the “Mobile Browser View” feature in any specific sub-site): Home Page, Web Part Pages, Wiki Pages, Document Libraries, Lists, Site Contents, and Site Settings.
Initial Thoughts
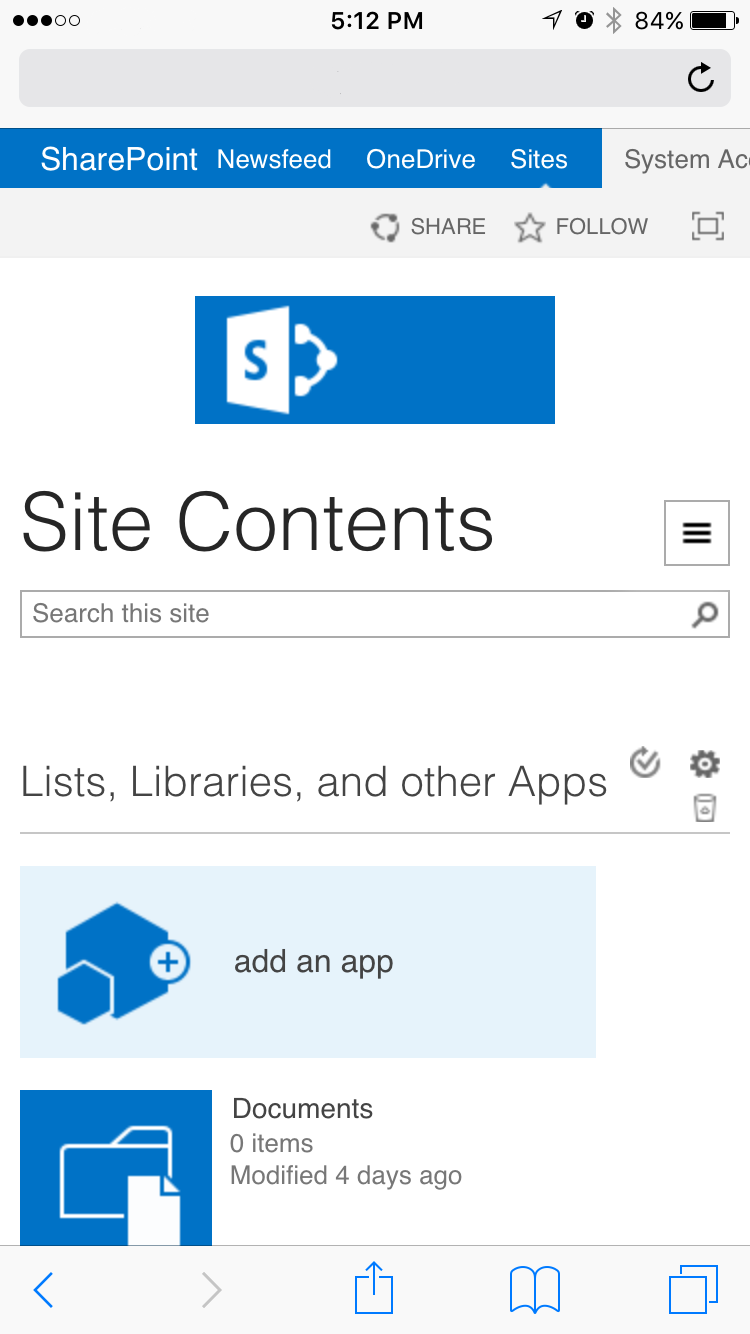
It’s important to note that this is a living / breathing solution; issues can be raised in GitHub and folks are working on fixes. For example, when I first tried using the solution, it didn’t work when I browsed my site from iPhone because the viewport was just zooming out all the way to show the entire default UI and nothing was responding… but that issue has been fixed as you can see from my screenshot:
That being said, I want to be clear that this is a first step to making a SP Team Site responsive. There are likely many little issues that you will run into if you really want a perfectly responsive SP experience. Some examples:
- Large Lists and Libraries will still scroll off the page
- The Ribbon still adds a good bit of weight to the page
- The Ribbon makes page scrolling on a mobile device feel strange and not at all native
- There are two “hamburger” menus in this solution, one on the left for quick launch and one at the top for global navigation. I’m not sure how I feel about this from a UX perspective but it’s not very common
- Per the description page, only Team Sites were tested, and only certain areas of team sites got attention
- Various page UI elements still could be non-optimized for responsive, like calendars and Gantt charts (I haven’t checked, but I’m assuming).
All things considered this is a good first step, worthy of trying out in your test environment and I would expect it to get better over time. Despite all this, I still wish there was a Feature built in to SharePoint 2016 by default that could just turn something like this on and off without having to use open source solutions.
Installing the Responsive UI Package
If you are new to the PnP project you may not realize there are a few steps you need to go through before starting to work with the Responsive UI Package. Here are the steps I had to go through before it would work with my SharePoint 2013 instance:
- Make sure your SharePoint 2013 is updated to SP1 as well as at least the April 2015 CU. Apparently the PnP group considers that the minimum version and I found out the hard way in my VM that it doesn’t work with just SP1 (Error: Could not load type ‘Microsoft.SharePoint.Client.AuditMaskType’ from assembly ‘Microsoft.SharePoint.Client,
- Version=15.0.0.0, Culture=neutral, PublicKeyToken=71e9bce111e9429c’). I chose to go with the May 2015 CU since that seems to be a pretty reliable CU. You can find info on all the updates at my friend Todd’s blog page: http://www.toddklindt.com/blog/Lists/Posts/Post.aspx?ID=346
- PowerShell needs a few updates as well. You need the Azure AD Module for Windows PowerShell (more info) (download)… but before you install that you will need to install the Microsoft Online Services Sign-In Assistant (download).
- At that point PowerShell is ready to work with the PnP code but before you can jump into the Responsive UI Package you need to get the PnP base code from http://aka.ms/officedevpnpcmdlets15. That will download an MSI file that you can easily install on your computer.
- Now you are ready to grab the Responsive UI Package from https://github.com/OfficeDev/PnP-Tools/tree/master/Solutions/SharePoint.UI.Responsive. The easiest way to get it if you aren’t a GitHub expert is to follow the link on that page to https://github.com/OfficeDev/PnP-Tools/archive/master.zip. I made an easy to access folder on my computer (like C:/solutions) and unzipped it there.
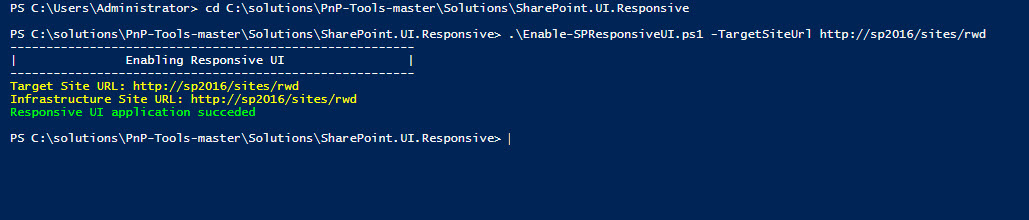
- Now you can finally open up PowerShell and run some commands. I like to first navigate in PowerShell over to where the files were unzipped. In this case I entered cd C:\solutions\PnP-Tools-master\Solutions\SharePoint.UI.Responsive into the PowerShell window
- From there you can run the code a couple of ways. The simplest is to just update a Site Collection with the Responsive UI code. For that you would enter something like this into PowerShell (replace my URL with yours obviously):
.\Enable-SPResponsiveUI.ps1 -TargetSiteUrl http://sp2013/sites/respond
Another way you can install it is to add the source JS and CSS to an infrastructure Site Collection while applying the responsive UI to another like this:
.\Enable-SPResponsiveUI.ps1 -TargetSiteUrl http://sp2013/sites/respond -InfrastructureSiteUrl http://sp2013/sites/pnp

Note: If you want to remove the Responsive UI later you can simply run:
.\Disable-SPResponsiveUI.ps1 -TargetSiteUrl http://sp2013/sites/respond
- If everything worked correctly you should see a window pop up and ask for your site credentials and then PowerShell will run the code and it should finish by displaying Responsive UI application succeeded in green text
- Enjoy your responsive SharePoint site!
That’s about it for the Responsive UI Package for SharePoint on-premises, let me know what you think of it in the comments or on Twitter @drisgill.