I think one of the most common needs in any business is to create a simple approval workflow for more than one person to approve or deny a request. Office 365 has many simple to use tools that can be combined to create a user-friendly solution to this problem. Microsoft Forms can be used to quickly create a form that anyone in your organization can fill out, then a Flow can be created to pick up the responses, write them to a SharePoint list, and then send approval emails to multiple people to approve / or deny the request. Flow can then update the SharePoint list with the results as well as emailing back the original Form submitter with the result.
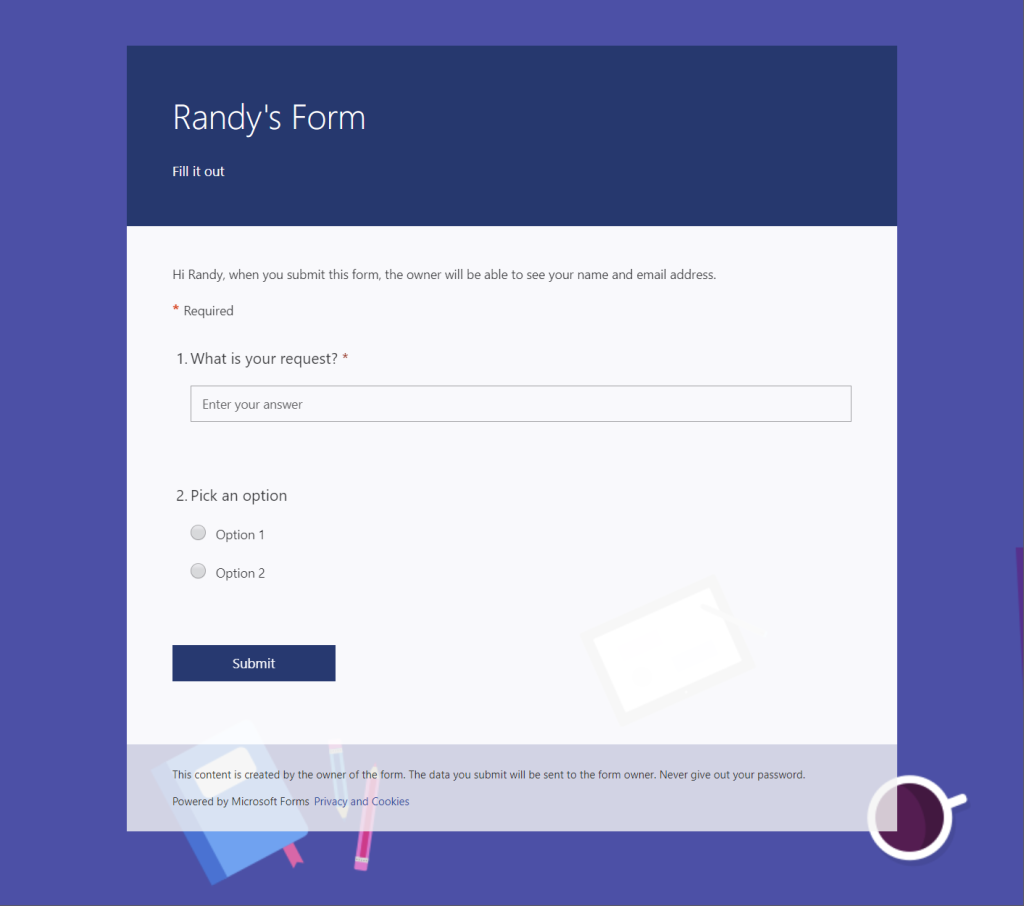
To create something like this its best to start with the Form and the SharePoint list. If you can get both of these right before starting your Flow, it makes picking options in Flow much easier. Here is a simple Form I created with just two fields for this example:
Once you have your Form created, you can create a SharePoint List to receive the selections as well as columns to collect the approvals and reasons from each approver (for this demo I have Randy and Rachel doing approvals). For my list I have these columns:
- Title – Will holds the request text box entry
- Selected Option – Will holds the radio button entry
- Rachel Approval & Randy Approval – Each column holds the Approve or Reject from the Flow
- Rachel Reason & Randy Reason – Each column holds the Approval comment from each approver
I’ve found that it’s best to make all these columns either Single Line of Text or Multiple Lines of Text. These column types help make the Flow creation and operation go smoother. Here is a screenshot of my list:

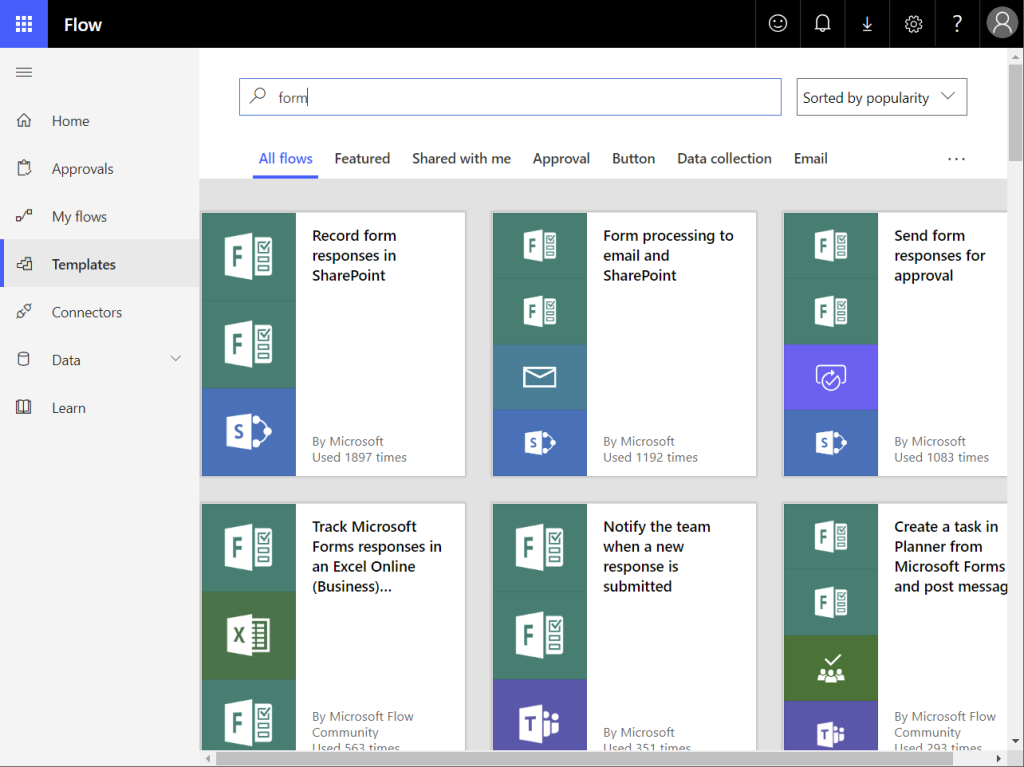
Next, to start creating my Flow, I opened Flow and used Create From Template, searched on “Forms” and picked the “Record form responses in SharePoint”:
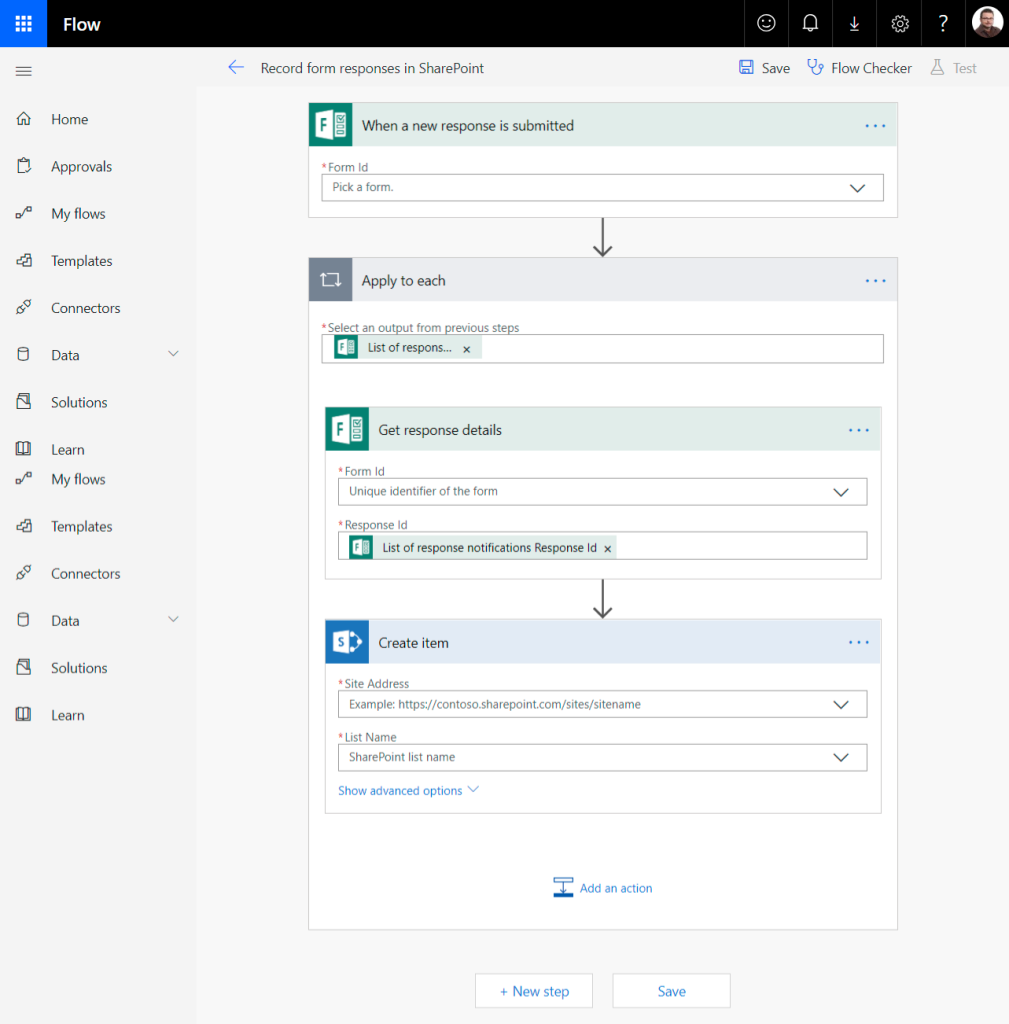
You may have to authenticate into each Flow connector at the next step, but after that the shell of a Flow will be created:
From there it’s a matter of filling out the Flow options to match your Form, SharePoint site, SharePoint list, and then picking Form fields to put into the SharePoint list columns:
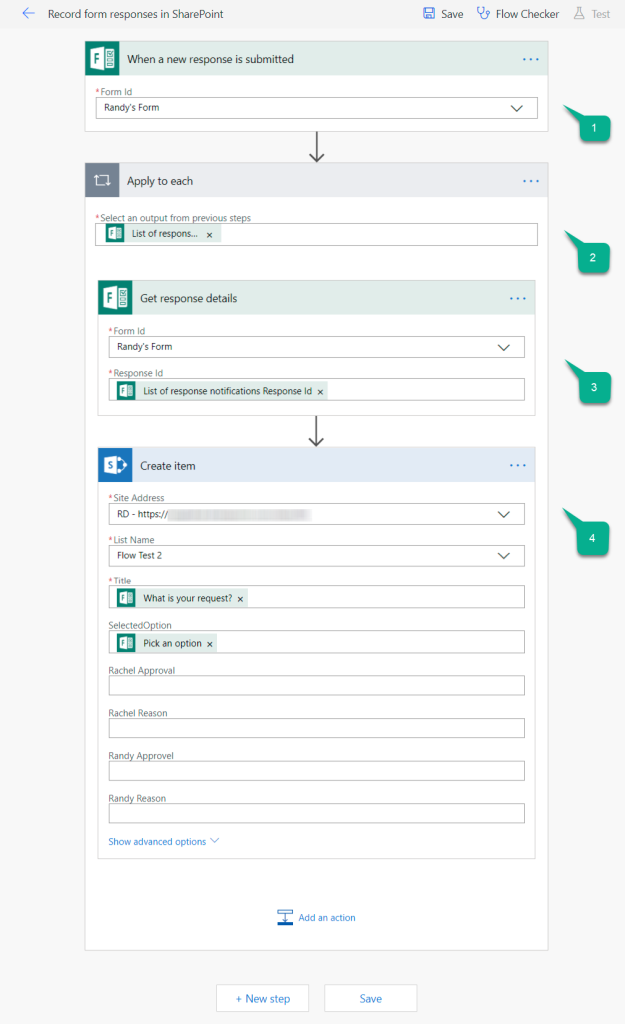
Step 1: Select your Form from the drop down
Step 2: Leave “List of responses” alone you will need that for the Flow to work
Step 3: Select your Form again (silly.. I know) and then leave the Response id with the default settings.
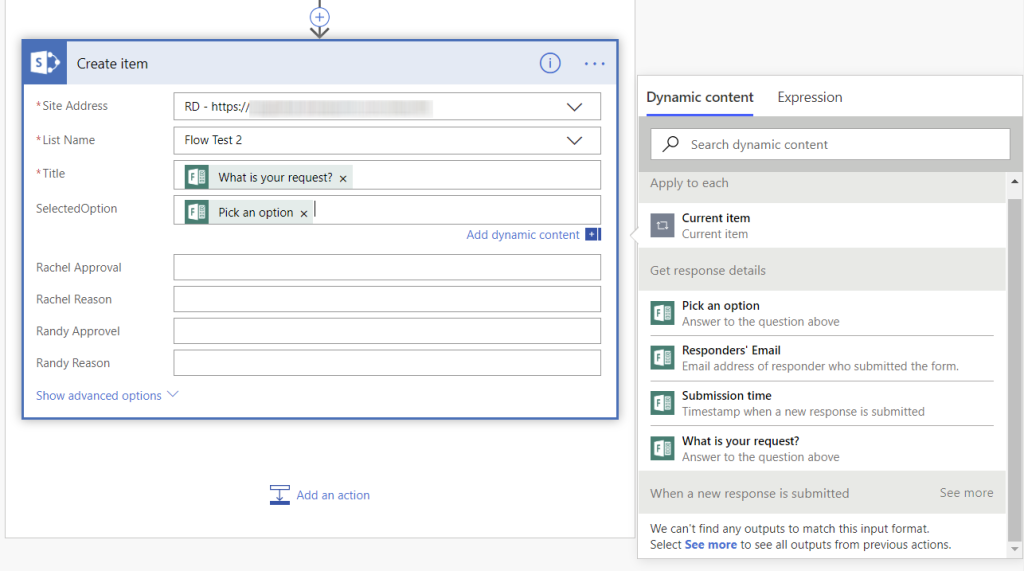
Step 4: Select your SharePoint site from the sites that you have access to. Then select a list from this site (therefore it’s best to have started by creating your list). After you select the list, all the available columns will flow out underneath it. Since we are just collecting Form entries right now, we can just drag Form fields into the Title and Selected Option columns.
For my Form I picked “What is your request” and “Pick an option”. The next screenshot shows how you select fields from your Form:
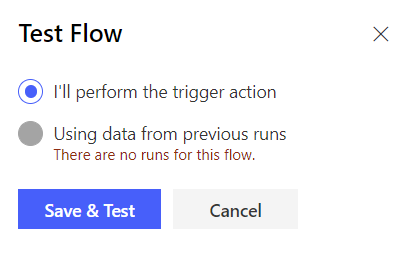
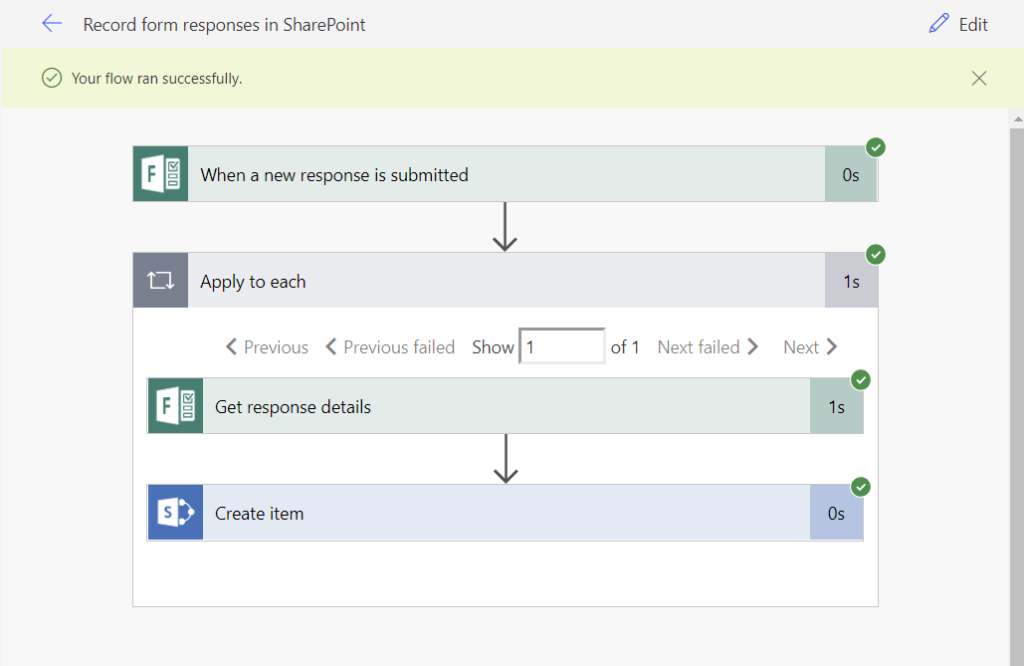
If all went as planned, you should be able to Save and Test your Flow now. When you submit your Form, it will kickoff the Flow and add a row to you SharePoint list. If you get errors, Flow will try to show you what you need to fix. If you run into any problems with Form fields, SharePoint lists, or list columns not showing correct in Flow, try closing the Flow a re-editing it. Sometimes Flow can be a pain about this.
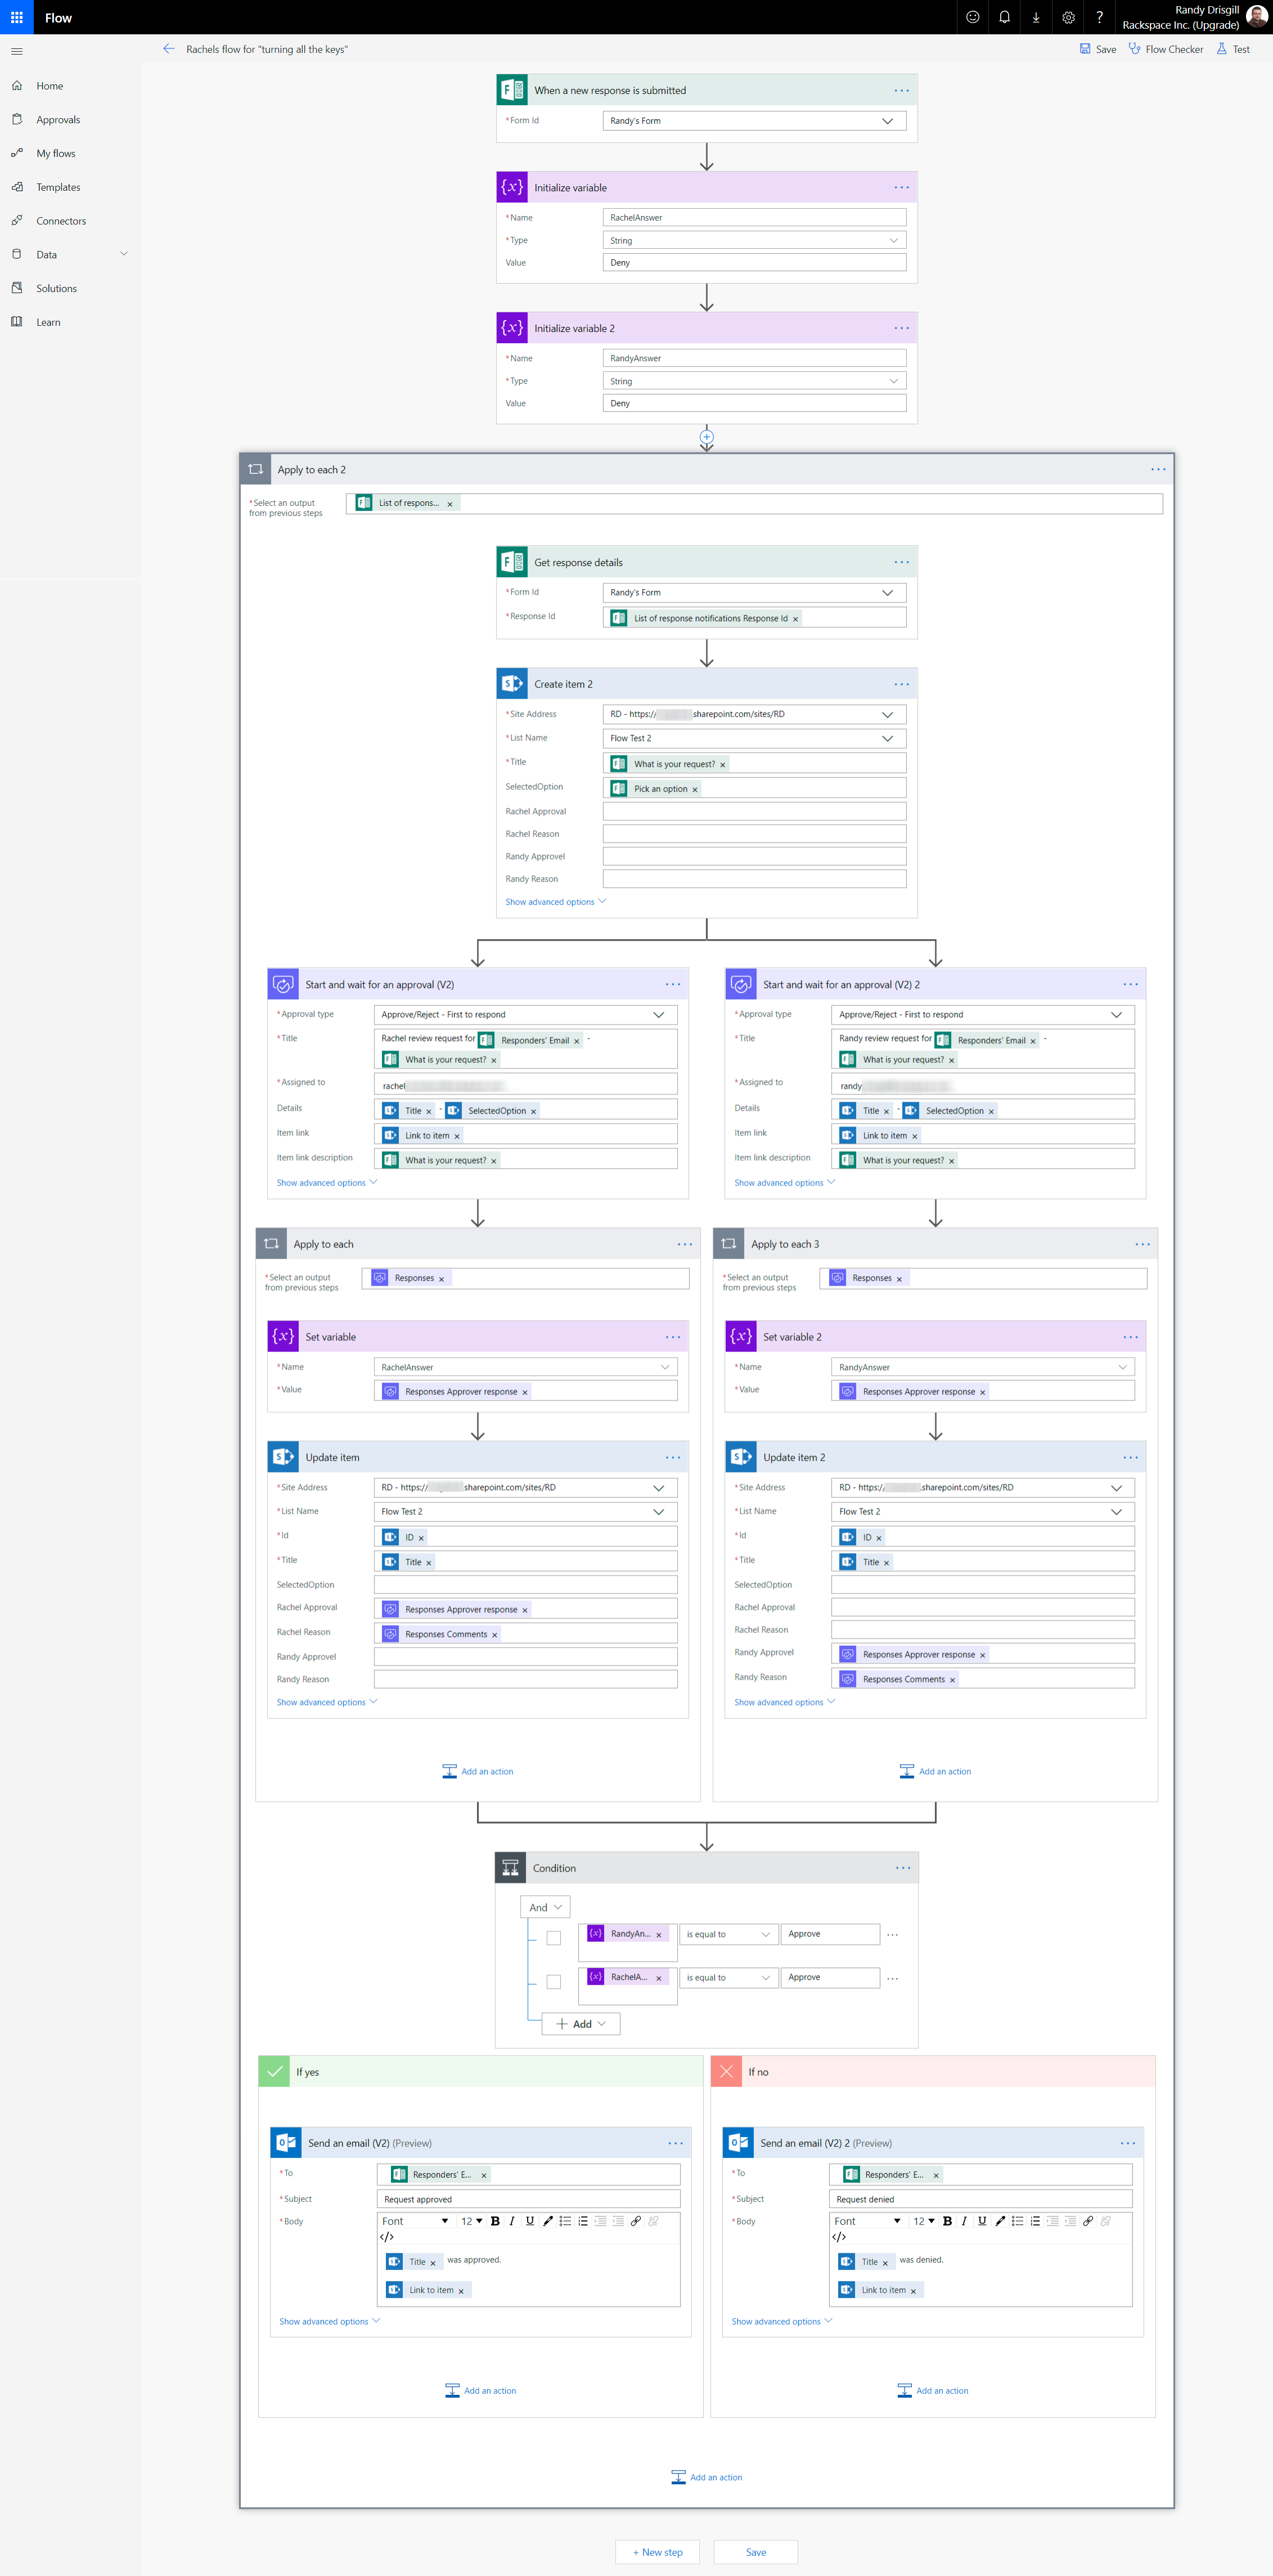
In the next part, we will need to add in the Parallel Approval steps, record those answers back to SharePoint, and then if both answers are Approved, we can send back an approval email or if not, a rejection email. For those that are impatient and want to try this on their own, I’ve included a screenshot of the final Flow (click to enlarge):